


Sale Flooring Direct Blog
How to Remove Laminate Flooring Safely
Posted: 1st May 2020
If your laminate flooring’s days are up, after years of wear & tear, or if the style has become a bit outdated, it might be time for a change?
So how do you take up laminate flooring? Firstly, there are two different types of laminate flooring; glued laminate or floating laminate.
1. Glued laminate is when glue is used to bind the planks of wood together. It can be slightly trickier to remove as sometime the glue can seep below the boards and get stuck to the floor. That means that this glue may have to be melted, but we will cover this later.
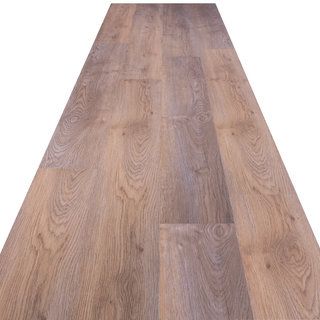
2. Floating laminate is the type that you are probably more familiar with and it simply ‘floats’ upon the subfloor with no glue or nails to secure it. It involves the clicking together of planks which means that they simply unlock when you want to separate them, therefore making removal more straightforward. A bonus to this type of laminate is that it can be reused, so if this is the case please take extra care to not chip or damage it for future use.
The pro's of removing your own laminate Floor
The main pro for DIY removal for laminate flooring is obviously the money you will save, but the other benefits are, you will gain confidence in learning new skills as well as reap the rewards when looking at your finished product with pride upon completion of the task.
Notably, when buying the tools for the job you still have them after for future projects. As well as this the cost of the tools may even cost less than you were quoted to remove the floor using an outside company. Speaking of tools, here is a list of what you will need.
Tools to remove laminate flooring
· Hammer
· Chisel
· Gloves
· Safety goggles
· Pry bar
· Pliers
· Protective footwear
· Floor scraper (if glue is used)
· Heat gun (if glue is used)
Before you get started
Remove all items of furniture from the room to give yourself good access to the floor.
If you want to reuse the laminate flooring, it’s a good idea to first, clean it & lift it up with extra care, making sure not to mark it.
Don’t forget – safety first! Always remember to wear protective clothing, especially covering your eyes and hands as splinters are very common in floor removals and its best to have your hands covered from the sharp edges of the wooden planks.
Step by step guide when removing laminate flooring
1. Remove the skirting boards
This will speed up the process dramatically. Starting at the door, using the chisel wedge the chisel between the wall and the skirting board. Then using the hammer tap the top of the chisel to pry the board from the wall, making sure to label them as you go to help you reinstall them at the end. Maneuver around the room, using the claw of your hammer to remove any nails along the way. If they are loose nails sticking out, using your pliers you can bend the nails at a 90-degree angle and then pull them out for added safety.
2. Preparing the floor
Glued laminate - To soften the glue, mop the floor initially before prying up the planks. Using a floor scraper you may need to run this along the surface at a 30-degree angle to remove any remaining adhesive residue.
Floating laminate – look for the transition piece, this is usually found at the door, where the floor moves or transitions from one room to the next. Remove this using a pry bar to pry it from the floor or a screwdriver to remove the screws securing it in place, depending on the kind of transition piece you have. This will reveal a U or C shaped trap underneath which will also need to be removed, usually with a screwdriver to create room for you to lift the planks up.
3. Lifting the planks
Now that you have clear access to the wood, either near the wall or at the transition point look for the tongue part of the wood. It will be easier to lift the wood from the tongue part than a plank with a groove. Taking your chisel, wedge this between the floor and the board at a 45-degree angle. Lever this to unsnap the planks from each other.
If the planks are glued together you may need to pull the plank towards you with your hands at a 90-degree angle until you can hear and see the glue snap. Repeat this process by working your way down the first row of panels.
4. Removing the remaining planks
Continue this process, repeating it for each row of planks until all of them are removed. The more planks that you lift, the easier the process will become as you become more familiar with the technique.
Once all the planks have been lifted you then simply need to remove the remaining subfloor, making sure to remove any of the adhesive glue using a floor scraper or heat gun to help you. If you had a floating floor you may need to use an orbital sander to help you to prepare the floor underneath the underlay or subfloor.
5. Finishing touches
Vacuum the floor using a wet/dry vacuum to remove any or the loose material. Now the area is ready for the new flooring.
Top Tips
Take your time, especially if you want to reuse the laminate flooring again.
The planks can break easily when they are being separated, so the more careful that you are, the more you will benefit from your patience.
Careful of using tools when separating the planks, as these can leave visible marks and indentations on the wood. When disposing of the wood, check your local area's recycling centre.
If you would like any more information regarding flooring options, visit our contact form or simply email us at [email protected] or call 0333 253 3377.

